

How To Make A Windows 7 Recovery Disk
two Ways to Create a Windows seven Recovery USB with/without DVD
By creating a Windows 7 recovery USB, you can protect all your data when you encounter system errors. Thus, side by side fourth dimension you want to repair your figurer, you tin perform the installation straight.
Fortunately, this article focuses on item steps to create a recovery USB flash bulldoze for Windows 7. What'due south more, you tin can get a powerful tool to recover the deleted or lost file easily and safely. Now, let'south read the post-obit paragraphs together to create a bootable Windows seven recovery USB flash bulldoze.
- Part 1: What Is a Recovery USB
- Part two: How to Create Windows vii Recovery USB Flash Bulldoze (DVD drive required)
- Part 3: How to Create Windows 7 System Recovery USB without DVD Disc
- Office 4: Best Mode to Recovery All Deleted/Lost Files on Windows 7 Hands
Part one: What Is a Recovery USB
To start with, you demand to figure out the definition and usage of the recovery USB. Well, the Windows vii recovery USB is created from "Backup and Restore" department. As a effect, you can kicking your Windows 7 organization with no extra cost and data loss. Of course, it is also supported to create other recovery drives or discs for Windows 7, Windows viii, Windows 10 and Windows versions.
Part two: What Is a Recovery USB
Step one : Burn Windows seven to DVD disc
Open up Windows "Start" menu and enter "Create system repair disc" in the search box. Printing "Enter" on your keyboard to motility on. Insert a blank DVD into the DVD bulldoze on your Windows vii computer. Then choose your DVD disc from "Drive" option in the popping-up window. Click "Create disc" on the lower right corner to move on. Expect for a while to complete the DVD called-for process.
Step ii Run Control Prompt with administrator privileges
Plug your USB drive into the specific port. Be aware to transfer the previous files into other external storage devices in advance. Subsequently, run "Command Prompt" in the "Start" carte. Correct click and select "Run as ambassador".
Step 3 Make a Windows 7 recovery USB bulldoze
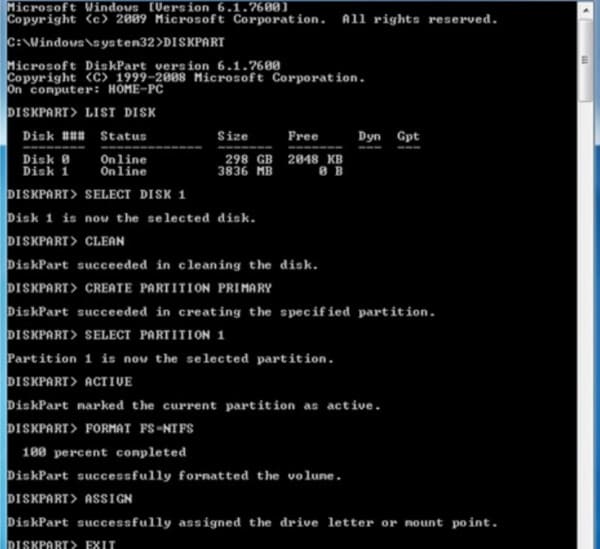
Blazon the following commands in club and printing "Enter" every time you lot blazon a new control.
DISKPART > LIST Disk (Choose your USB bulldoze) > SELECT DISK 1 > CLEAN > CREATE PARTITION PRIMARY > SELECT PARTITION 1 > Active > FORMAT FS=NTFS > ASSIGN > Exit
At last, copy and paste all contents created previously in the DVD disc into your USB wink drive.
Part 3: How to Create Windows 7 System Recovery USB without DVD Disc
Step 1 Remove the previous sectionalisation
Locate the Command prompt so head to "Run". Type "CMD" in the certain blank. Afterwards, press "Enter" key on your keyboard. Type "DISKPART" to find this tool in the "Listing Deejay". Well. Yous demand to find and click the number assigned to your USB cardinal in diverse options. Enter "Select Deejay" plus the number of your USB primal in the fixed surface area. Then choose "Make clean" to delete the selected partitioning.
Pace 2 Create a bootable USB
Enter "Create Partition Master" and choose "Active" to create a new partition. Consequently, your partitioning will exist reactive. After, blazon "format fs=fat32 quick" and so choose "Assign". When the process finishes, you can type "Exit" for two times in the specific field.
Pace 3 Access all subconscious files, folders and drives
During this time, you need to brandish hidden files and so back up them into Windows 7 recovery USB flash drive likewise. So choose "Computer" in the "Start" menu. Click "Organize", "Folder Options and Search" and "View tab" options in order. Mark the small box before "View hidden files, folders and drives" option. Meanwhile, you need to uncheck options earlier "Hide extensions for files whose type is known" and "Hide protected files of the operating system".
Pace 4 Create Windows 7 recovery USB without DVD
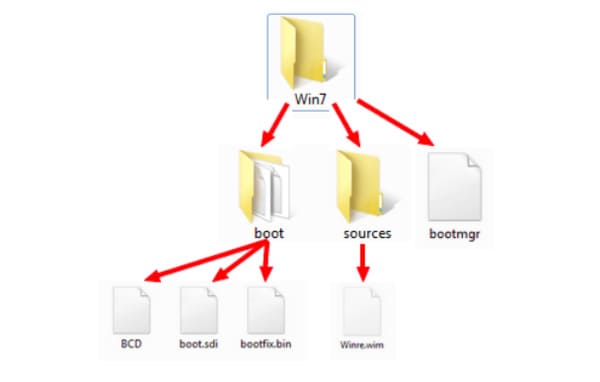
Create a new folder with the name you lot like, well, "Win7" will be a good pick. And so create other two new folders inside with the name of "Sources" and "Boot". Actually, it does non matter if you apply new titles.
Re-create and paste "C:WindowsBootPCATbootmgr" under "Win7" folder direct. So open "Boot" folder to paste "C:WindowsBootDVDPCATboot.sdi", "C:WindowsBootDVDPCATBCD" and "C:WindowsBootDVDPCATfr-FRbootfix.bin" files.
Head to "Source" folder to paste "C:Recovery486aab42-cf02-11de-be22-c44fb1debe9dwinre.wim" into it.
Afterwards, you can copy and paste the entire "Win7" folder into your USB flash bulldoze directly. Well, rename the "BCD" file as "bcd" and "winre.wim" equally "boot.wim".
Function 4: Best Way to Recovery All Deleted/Lost Files on Windows vii Easily
What if you only want to recover 1 or two files on Windows 7/8/ten/XP/Vista? It seems besides time wasting to install or repair with Windows 7 recovery USB ISO. During this time, you can choose Aiseesoft Data Recovery to solve the trouble. Information technology is a smart Windows data recovery software that can aid y'all recover any deleted or lost file safely and quickly.
- Support various recoverable devices including Windows, memory cards, flash bulldoze, digital photographic camera camcorder, difficult drive and removable drives.
- Provide many recoverable data types like documents, images, videos, audios, emails and more.
- Get 4 data recovery modes to browse and recover files in all situations.
- Search and recover the lost data speedily by the specific factors.
Step ane Launch Windows 7 data recovery software
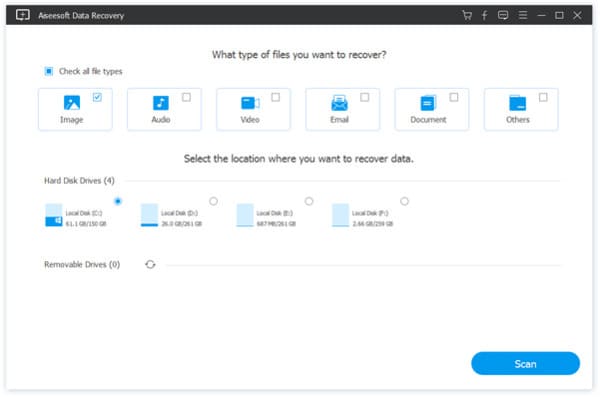
Complimentary download and install Aiseesoft Data Recovery software on your Windows 7 estimator. Launch this plan and choose the data blazon you want to recover.
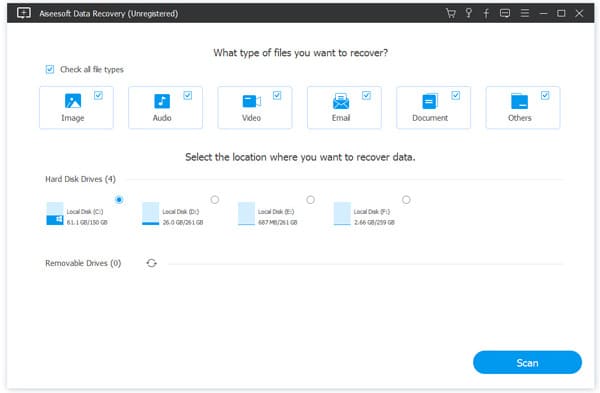
Footstep 2 Gear up the recoverable data type and disk drive
Select which disk drive you may discover the lost or deleted file nether "Hd Drives" category. Later on, choose whether to operate "Quick Scan" or "Deep Scan".
Click "Scan" pick to move on.
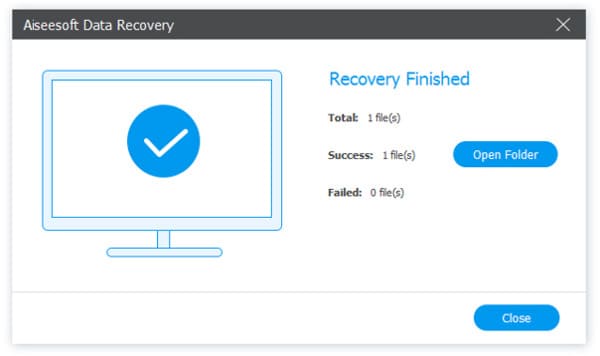
Step 3 Recover Windows 7 file
When the scanning process finishes, yous can utilize "Filter" feature to cull the sure file to preview and recover quickly. At last, click "Recover" to go your deleted or lost file back to Windows 7 safely.
Past following above steps, you can recover and repair your Windows 7 calculator successfully. Feel gratuitous to contact u.s. if y'all still have whatever question nearly creating a Windows vii recovery USB. What'due south more, it is worth to free download Data Recovery software on Windows 7 to accept a endeavour.
What do you remember of this mail?
- 1
- 2
- three
- four
- 5
Excellent
Rating: 4.5 / 5 (based on 37 ratings)
More Reading
-
 How to Recover Data from a Failed SSD
 Are yous facing the SSD failure situation and looking for the all-time way to restore your lost data? Learn to make SSD data recovering hither.
-
![How to Recover Sticky Notes [All Solutions]](https://www.aiseesoft.com/images/more-reading/recover-sticky-notes-s.jpg) How to Recover Viscous Notes [All Solutions]
How to Recover Viscous Notes [All Solutions] What is Microsoft Sticky Notes? How to recover deleted or lost Sticky Notes files? You can notice the best information recovery hither to support and rescue your Gummy Notes.
-
 How to Convert AVCHD Video to SD
 Catechumen AVCHD video to SD – Guide about how to convert AVCHD video to SD video, like AVI, MP4, MOV, 3GP, etc. Gratuitous download AVCHD Video Converter to convert AVCHD to SD video.

How To Make A Windows 7 Recovery Disk,
Source: https://www.aiseesoft.com/solution/windows-7-recovery-usb.html
Posted by: doanewiteld.blogspot.com
0 Response to "How To Make A Windows 7 Recovery Disk"
Post a Comment